
Hello everyone! Gloria here with you today sharing a card tutorial. I have created a French country anniversary card with the Hepburn Embossing Folder and a few fun stamping techniques.

1. Create a 5 1/2 x 4 1/4 inch top-fold card from black cardstock.

2. Emboss kraft cardstock with the Large Hepburn Embossing Folder from the Elegance Collection.
3. Ink a script
stamp with black dye ink and stamp onto the embossed paper. Press very
lightly to ensure that you are only stamping on the raise part of the
paper.

4. Continue
stamping with the script stamp until you have covered all embossed areas. Trim the embossed cardstock to 5 3/8 x 4 1/8 inches and attach to the
front of the card.

5. Trim black
cardstock to 2 x 4 1/4 inches. Trim printed paper to 1 7/8 x 4 1/8
inches and attach to the black cardstock strip. (I have used Graphic 45 French Country papers.) Wrap brown twine around the center of the panel and attach the panel to the card front with Foam Mounting Tape, approximately 1 1/4 inches from the top of the card.

7. Using the Key To My Heart Die from the Endless Dreams Collection, cut two keys from cream cardstock. Rub one key with Burnt Copper pigment ink and the other with Verdigris. Allow to dry.
8. Using a
script stamp and black dye ink, stamp both keys with the script image.
Tie the keys to the right side of the card with twine.

9. Using the Scallop Rectangle Nesting Dies, cut a scalloped rectangle from black cardstock.
10. Line the Rectangle Nesting Die template over the printed sunflower image and tape down. Cut and adhere the image to the scalloped rectangle mat.
11. Using Foam Mounting Tape, attach the image to the left edge of the card, overlapping the twine.

12. Decorate
the inside of the card with a strip of printed paper and a postage image
stamp (Hampton Art/Graphic 45 French Country). Stamp an French
anniversary greeting in the center of the panel with black dye ink.
CO723046 Rectangle Nesting Dies
CO723047 Scallop Rectangle Nesting Dies
CO723222 Fantasia Collection - Ivy Doily Die
CO723418 Endless Dreams Collection - Key To My Heart Die
CO723448 Elegance Collection - Large Hepburn Embossing Folder
CO721956 Sharp Point Craft Scissors
CO721986 Handheld Essentials - Piercing Tool, Embossing tool
CO721983 Double-Sided Tape
CO721963 Foam Mounting TapeCO721986 Handheld Essentials - Piercing Tool, Embossing tool
CO721983 Double-Sided Tape
CO721957 Cutting Mat
Other Supplies: Cardstock: WorldWin Papers Treasures Pitch Black, Colormates Light Totally Tan, Bazzill Basics Kraft; Patterned paper: Graphic 45 French Country; Rubber Stamps: Hampton Art/Graphic 45 French Country, Inspired by Stamping Background Basics III, Big Notes in French II;
Stamping Ink: Tsukineko Memento Tuxedo Black, Clearsnap Colorbox Pigment Burnt Copper, Verdigris; Other: Twine
***********
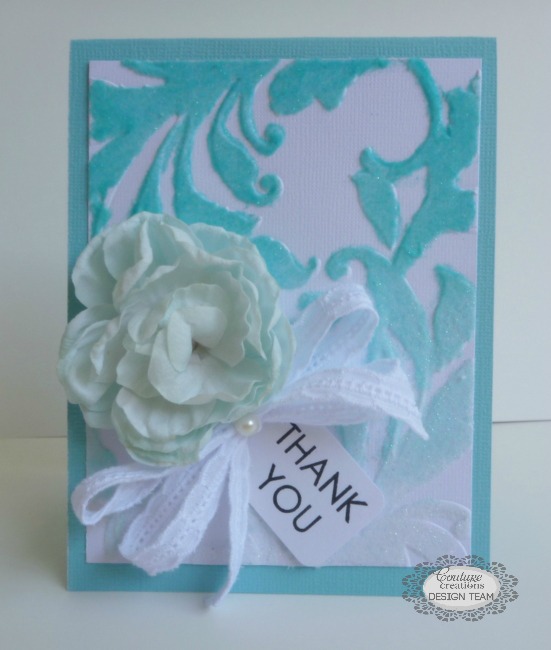

Hi! Dana here today sharing how to make your own flocked cardstock with the Hepburn Embossing Folder from the Couture Creations Elegance Collection and flocking powder. The raised areas of embossed cardstock provides a flat surface that is ideal for adding flock.


1. Emboss a piece of cardstock with the Couture Creations Hepburn Embossing Folder.


2. Choose several colors of flocking powder. Use a glue
pad, craft glue or a double-sided adhesive to apply the flocking powder
to the cardstock.


3. Pour the flocking over the cardstock, pat down using a scrap piece of paper, and shake of the excess. Repeat for the remaining colors of flock.


4. Use a heat tool to set the flock for a more permanent finish. Trim the excess cardstock from the flocked design.

5. Mount the flocked cardstock onto a card base and embellish to finish.
Thanks so much for stopping by today!
~Dana
Couture Creations Supplies:
CO723289 - Elegance Collection - Hepburn A2 Embossing Folder
CO721996 - Self Adhesive Pearls - Crystal
Other Supplies: Cardstock: Core'dinations; Tag: Avery; Flower: Prima;
Ribbon: May Arts; Stamp: Paper Wings Productions; Ink: Tsukineko;
Flocking Powder: Martha Stewart
Please stop by every day this week for more projects featuring the Hepburn Embossing Folder!
No comments:
Post a Comment